by Brian | Mar 27, 2017 | Recipes, Uncategorized
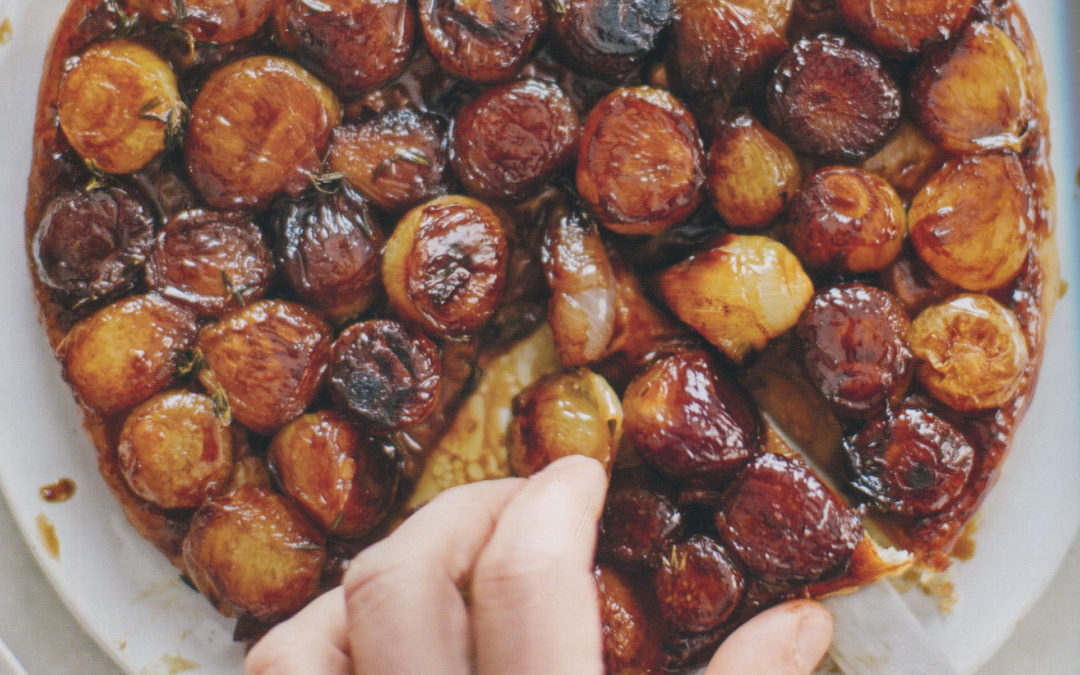
In the wonderful Onions Etceterea, Kate Winslow and Guy Ambrosio give you a world tour of alliums: onions, scallions, garlic, chives and shallots. Oh, and pearl onions. You may have had apple tarte tatin. Here’s a savory version made with pearl onions! It’s...

by Brian | Dec 18, 2016 | Recipes
If you are reading this early Sunday morning, you have a chance to dash to the store, do some buying and return home to prepare an elegant brunch. Otherwise, you have a whole week to prepare in advance for this excellent brunch main course. It’s from the...

by Brian | Sep 27, 2016 | Recipes
In Make Mine a Martini, author Kay Plunkett-Hogge presents this an array of cocktails for you to consider, not just a wonderful martini. There are classics here and some new ones, like The Fine & Dandy, a combo of lemon juice, Cointreau and gin. But this...

by Brian | Jul 6, 2016 | Recipes
You know what an onion tart looks like. It’s the epitome of French food with those caramelizing onions densely scattered over the top. In the American South, things are a bit different. It’s a pie, not a tart, and in this particular recipe the...

by Brian | Jun 15, 2016 | Recipes
If you are reading this blog on our website, Cookingbythebook.com, then you’ve discovered the site for my wife’s cooking school. Several times a week, 20 to 50 people come to our Tribeca loft and cook a meal together in our kitchen. The large group is...